Windows – Adding a Printer
Tech Services installs a nearby default printer on each computer, based on location. If the printer you would like to print to in not installed your computer, you will need to add it.
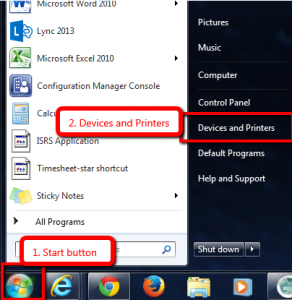
1. Click the start button
2. Click Devices and Printers on the right hand side
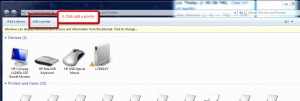
3. Click Add a printer at the top of the screen
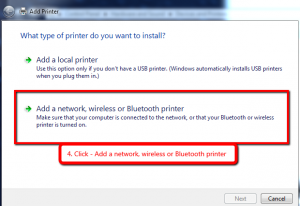
4. Click – Add a network, wireless or Bluetooth Printer
Select a printer has a short list – not all the printers are listed here.
5. Click – The printer that I want isn’t listed
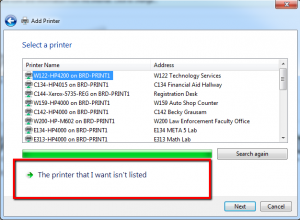
6. Next
7. Click Find a printer in the directory, based on location or feature (top option)
8. Next
In here, you will find all the printers listed for Staples and Brainerd Campus
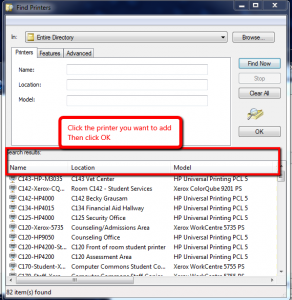
9. Click the printer you want to add then click OK.
10. It will install a print driver
11. Next
If you want this printer to be the default printer – check the box – Set as default printer
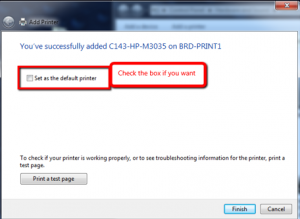
12. Click Finish
Your printer should be successfully added.
Happy Printing!!
